
CRM 2011 - Create Custom Workflow Activities#
Because the Release Preview Guide February 2012 contains the following statement,
CUSTOM WORKFLOW ACTIVITIES IN CRM ONLINE
With the Microsoft Dynamics CRM Q2 service update, developers can build custom .NET Workflow activityassemblies for Microsoft Dynamics CRM Online. These custom assemblies can be developed and deployed as partof a Microsoft Dynamics CRM solution package. Once a custom workflow activity has been deployed, it can thenbe utilized within the workflow engine for business process management. These new capabilities ensure parity inthe developer experience between Microsoft Dynamics CRM Online and on-premises. It also empowers**organizations to bring external data, custom actions and integrations into their standard CRM business processes.
the Custom Workflow Activities could be interesting, also for product development in CRM 2011. Today, the Custom Workflow Activities are running in OnPremise Deployments but not in Online Systems. Because the Microsoft SDK Example is a little too confusing for a first approach, i have decided to create this small examle (based on the SDK-Stuff).
The Problem:
Create a Custom Workflow Activity, that creates a (follow up-)Task after an Account was created. (This is just an example. You can use default workflow functionality to reach this target.)
1. Create Solution with Project
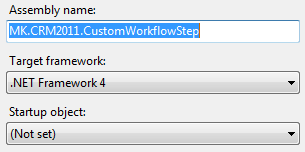
The first step is to create a Visual Studio 2010 Project.
Select Visual C# -> Workflow -> Activity Library
Select .NET Framework 4
Select Name for Solution and Project
Select Location

2. Check Project Settings
Check that the Framework-Type is NOT .NET Framework Client Profile. The correct one is .NET Framework 4.
3. Create the Class
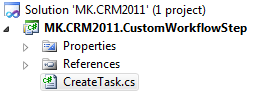
Delete the automatically created class Activity1.xaml and create a class called CreateTask.cs.
4. Adding References and Usings
Add references to the following assemblies (Rightclick References in the project and add…).
microsoft.xrm.sdk.dll
microsoft.xrm.sdk.workflow.dll
Add the reference for System.Runtime.Serialization, which is part of the .NET Framework.
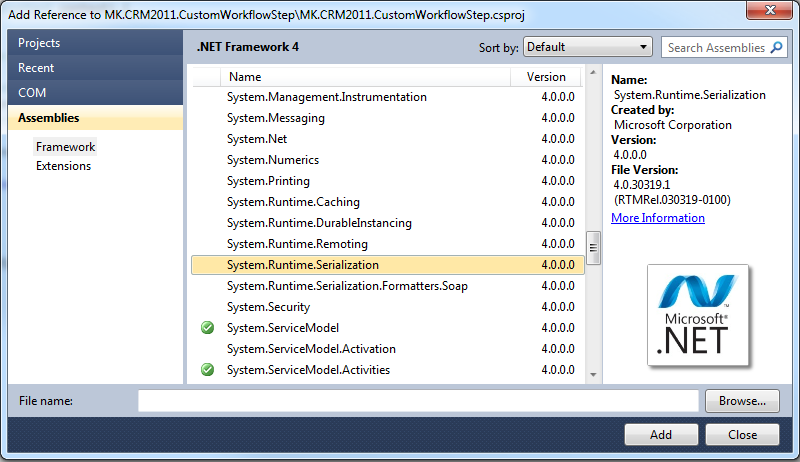
(Hint: The Add References window here is not the default VS2010 one. This one is part of the Productivity Power Tools. A (MUST HAVE-) Addon for Visual Studio 2010!)
Add the following using-Statements to your class.
using System;
using System.Collections.Generic;
using System.Linq;
using System.Text;
using System.Activities;

using Microsoft.Xrm.Sdk;
using Microsoft.Xrm.Sdk.Workflow;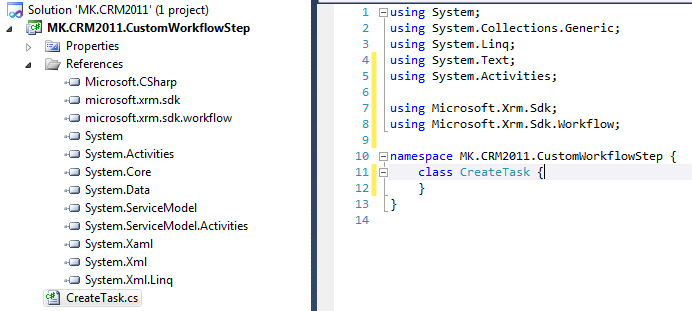
5. Inheritance
Make our class inherit from CodeActivity (System.Activities) and implement the method Execute. You also have to make the class public.
using System;
using System.Collections.Generic;
using System.Linq;
using System.Text;
using System.Activities;

using Microsoft.Xrm.Sdk;
using Microsoft.Xrm.Sdk.Workflow;

namespace MK.CRM2011.CustomWorkflowStep {
 public class CreateTask : CodeActivity {
 }
}
6. Input Parameters
We would like to put a parameter in our Workflow. So every customer can define the subject of the task by it’s own.
using System;
using System.Collections.Generic;
using System.Linq;
using System.Text;
using System.Activities;

using Microsoft.Xrm.Sdk;
using Microsoft.Xrm.Sdk.Workflow;

namespace MK.CRM2011.CustomWorkflowStep {
 public class CreateTask : CodeActivity {

 #region Input Properties
 [Input("Task Subject")]
 [Default("Empty Subject")]
 public InArgumentstring>TaskSubject{ get; set; }
 #endregion

 protected override void Execute(CodeActivityContext context) {
 throw new NotImplementedException();
 }
 }
}
The following code has to be added into the Execute-Method.
7. Create Context and Service
The contextwe need for retrieving the ID of the current record, the serviceis required for communication with CRM-Webservice (IOrganizationService).
//Create the IWorkflowContext and the

//IOrganizationService for communication with CRM
IWorkflowContext workflowContext =
 context.GetExtensionIWorkflowContext>();
IOrganizationServiceFactory serviceFactory =
 context.GetExtensionIOrganizationServiceFactory>();
IOrganizationService service =
 serviceFactory.CreateOrganizationService(workflowContext.UserId);
8. Business Logic
Now we have to add the logic which does the following.
- Read Text from “TaskSubject” Input Parameter
string newSubject = TaskSubject.Getstring>(context);- Create a new task object
Entity newTask = new Entity("task");- Set subject of the task to TaskSubject value
newTask["subject"] = newSubject;- Set regardingobjectid of task to PrimaryEntityId of context (this is the id of the account).
newTask["regardingobjectid"] =
new EntityReference("account", workflowContext.PrimaryEntityId)- Create the new task in CRM
Guid taskId = service.Create(newTask);9. Sign the assembly
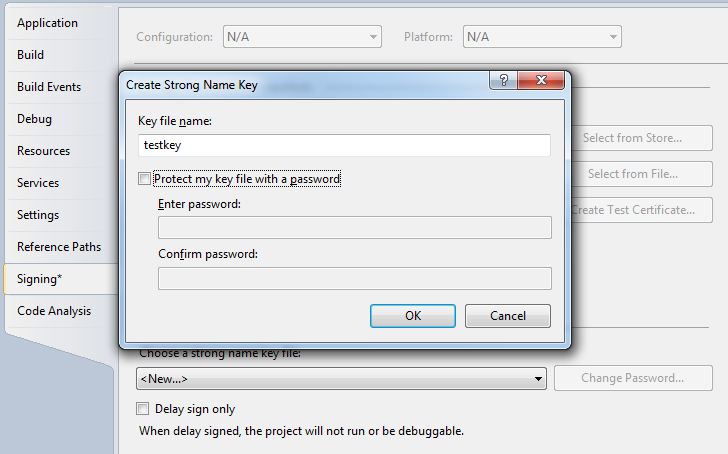
First of all, go to project settings and sign your assembly. Right Click the Project -> Properties -> Signing -> Sign the assembly -> New -> Enter Key file name “testkey” -> no password (for testing purposes).
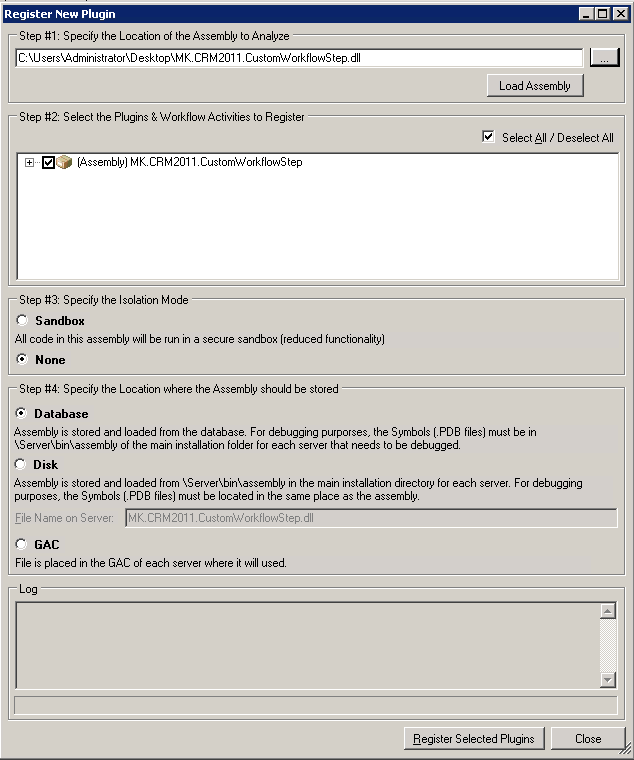
10. Compile and deploy the assembly Rebuild your solution and deploy the assembly to the CRM System. This can be done by the PluginRegistrationTool of microsoft. You can find this as part of the current CRM-SDK. You have to compile it by your own. Choose the following settings.
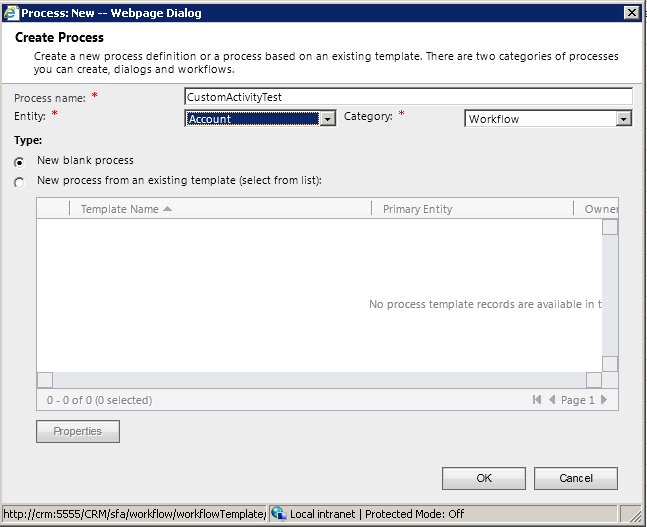
11. Create a Workflow with the new step Create a default Workflow in CRM. Choose the following settings.
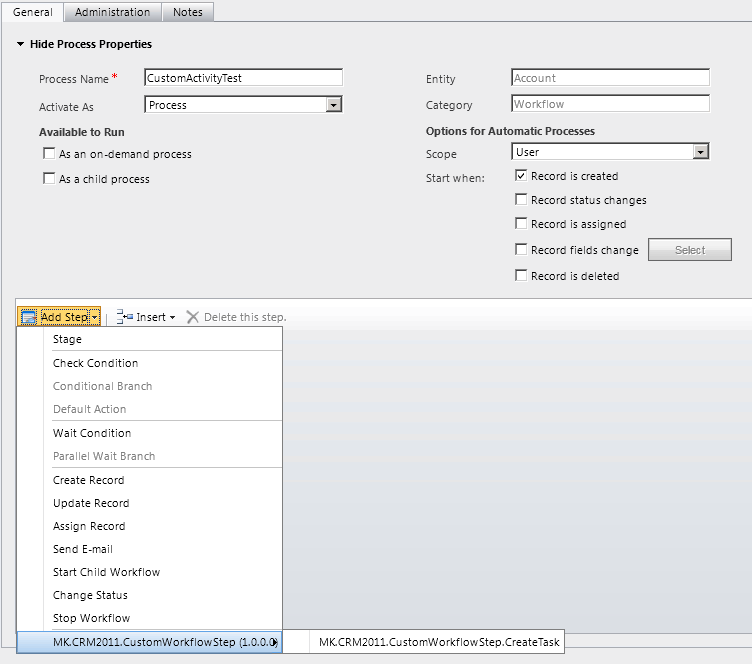
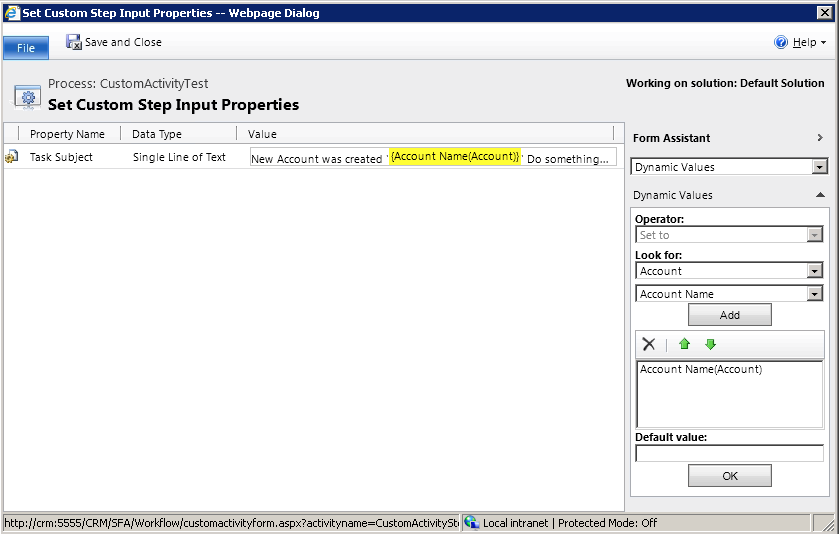
Push the SetProperties-Button of the step and select a default name for the Input Parameter (TaskSubject). Because the Owner of the new task should see which account was created, we add the name of the account as input parameter.
Now save and don’t forget to activate the Workflow.

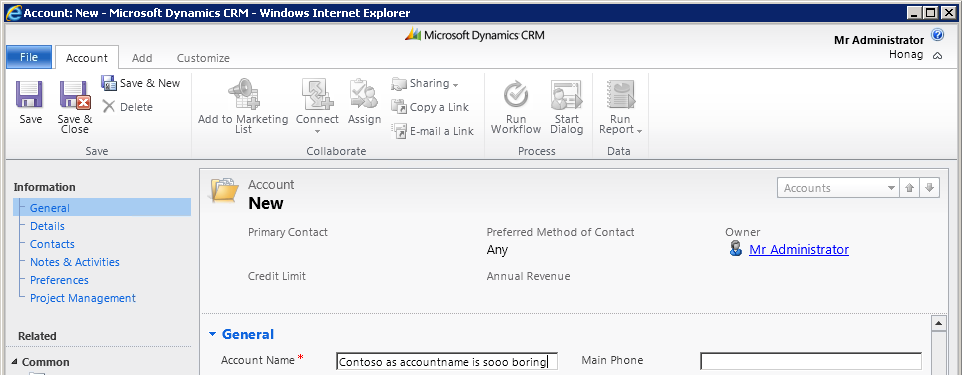
12. Testing Create a new Account in CRM.
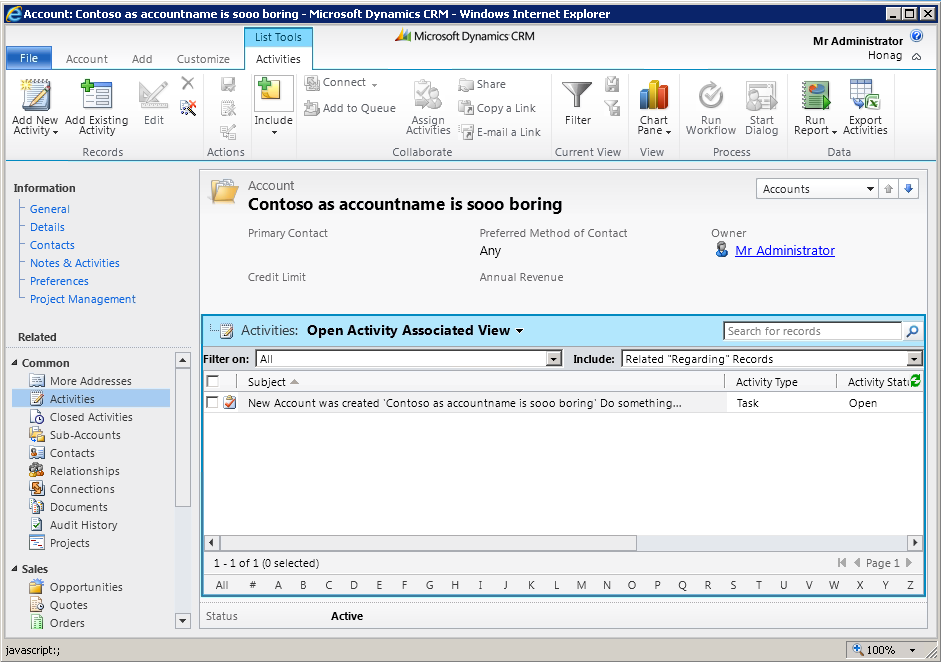
Processing the workflow can take some seconds. Open the Activity List of the account and select Filter on “All”. You should see our created task. The subject contains some static text and the name of the created account.
13. Code Overview
using System;
using System.Collections.Generic;
using System.Linq;
using System.Text;
using System.Activities;

using Microsoft.Xrm.Sdk;
using Microsoft.Xrm.Sdk.Workflow;

namespace MK.CRM2011.CustomWorkflowStep {
 public class CreateTask : CodeActivity {

 #region Input Properties
 [Input("Task Subject")]
 [Default("Empty Subject")]
 public InArgumentstring> TaskSubject { get; set; }
 #endregion

 protected override void Execute(CodeActivityContext context) {

 //Create the IWorkflowContext and the
 //IOrganizationService for communication with CRM
 IWorkflowContext workflowContext =
 context.GetExtensionIWorkflowContext>();
 IOrganizationServiceFactory serviceFactory =
 context.GetExtensionIOrganizationServiceFactory>();
 IOrganizationService service =
 serviceFactory.CreateOrganizationService(workflowContext.UserId);

 //Retrieve data from InputParameter
 string newSubject = TaskSubject.Getstring>(context);

 //Create the new task object (in memory)
 Entity newTask = new Entity("task");
 newTask["subject"] = newSubject;
 newTask["regardingobjectid"] =
 new EntityReference("account", workflowContext.PrimaryEntityId);

 //Create task in CRM
 Guid taskId = service.Create(newTask);
 }
 }
}
Ok, this is more detailed than i have planned. Hope it helps! Regards,
Markus